Category Archives: DIY

DIY Candida Cleanse

“Marinated Kale Salad-2” by Jules is licensed under CC BY 2.0

Hippocrates once said, “All disease begins in the gut.” 

Many people have a problem with Candida due to poor diet and lifestyle. You could argue that the majority of Americans have a problem with candida, and it’s important to understand the relevant health issues as well as how to properly address it.

Candida is yeast and bacteria that live in our gut. It is what we consider the “bad bacteria.” We also have “good bacteria” in our gut, which promotes a good immune system and healthy digestion. When we have higher amounts of candida than we have good bacteria – a candida overgrowth – it can cause serious health issues.

Some common health problems associated with candida overgrowth are:

  • Autoimmune disease
  • Asthma and allergies
  • Chronic fatigue
  • Brain fog
  • Depression and Anxiety
  • Skin rashes and acne
  • Digestive disorders (Crohn’s, IBS, etc)
  • Yeast infections
  • Hormonal imbalances

These are just to name a few…


How does someone develop candida overgrowth?

Candida feeds off of sugar and yeast. Eating foods high in refined sugars, high in carbs, and processed foods all contribute to candida overgrowth. Not eating enough foods that contain good bacteria also contributes to the problem. Taking antibiotics, birth control pills, and steroids all create an imbalance of bacteria in the gut.


How can I tell if I have a candida problem?

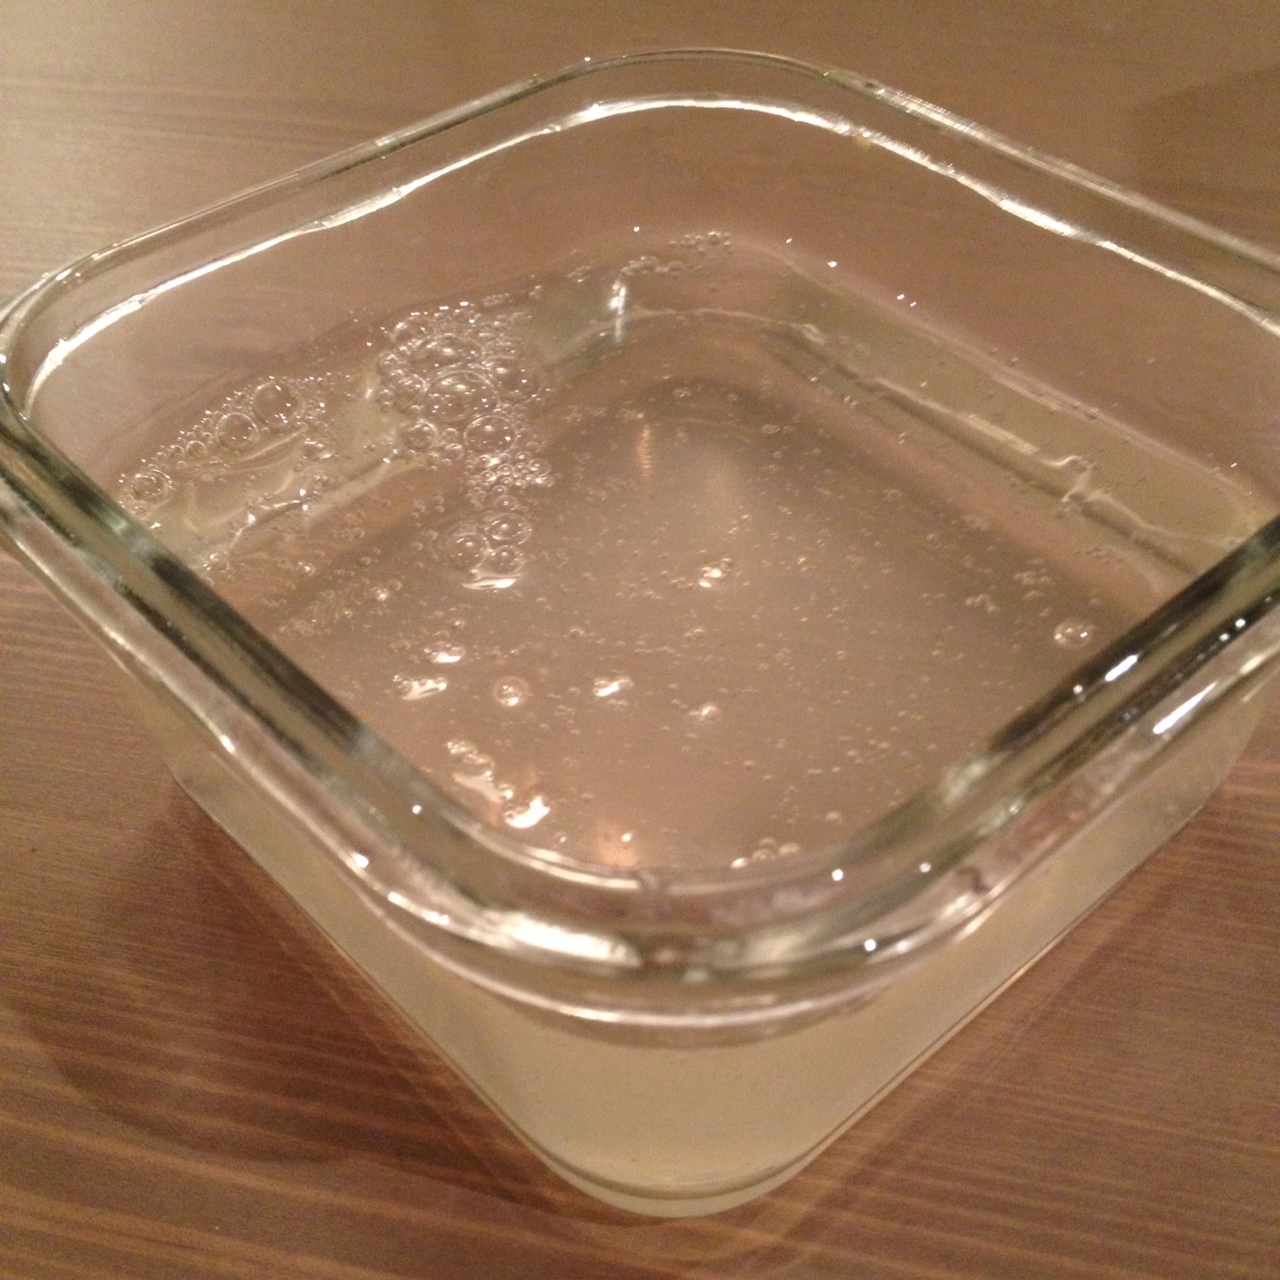
If you’ve eaten a conventional American diet throughout your life, you likely have a problem with candida. However, there are a couple of other clear indicators. If you have a white film on your tongue in the morning, this is often an indicator of candida overgrowth. Nail fungus can also be a sign of candida. You can conduct a “spit test.” Fill half of a glass with room temperature water. First thing in the morning, spit a dime-size amount of saliva into the glass. It should float at the top. Check it several minutes later. If the spit sinks, starts to form strings hanging from it, or you see a cloudy residue at the bottom, it indicates candida.


How do I get rid of candida overgrowth?

Doing a candida cleanse can help kill off the bad bacteria and help rebuild healthy bacteria in your gut.


There are two steps to a candida cleanse:

  1. Kill off the candida
  2. Add good bacteria


Killing off the candida:

  • Eliminate foods that feed the candida: 
    • Eliminate anything with sugar. No artificial sweeteners either. 
    • Avoid natural sweeteners (maple syrup, honey, coconut sugar, agave). Stevia is ok.
    • Eliminate foods with yeast (bread, crackers, pasta, etc).
    • Avoid fruit (berries other than strawberries and apples are ok in small amounts).
    • Avoid starchy vegetables (potatoes, sweet potatoes, pumpkin, other root vegetables, etc).
    • No alcohol.
    • Avoid dairy.
    • No processed food.
    • Take supplements that kill bacteria, yeast, and fungus at breakfast and lunch (garlic, oregano oil, grapefruit seed extract, olive leaf extract). Candida can become immune to a supplement, so it is best to take one for 4-5 days and then switch to a different one. You can rotate with a couple different supplements.


Adding healthy bacteria:

  • Eat plenty of fermented, cultured foods that contain natural probiotics (kefir, sauerkraut, kombucha, fermented vegetables).
  • Drink apple cider vinegar (I drink it as a “shot” – a tablespoon of vinegar in a shot glass then diluted with water).
  • Add unrefined coconut oil to tea or smoothies (it has anti-fungal properties).
  • Gluten-free grains in small amounts may be alright (brown rice, quinoa, oats). Listen to your body.
  • Eat lots of cooked vegetables (especially dark green veggies). Cooked veggies are easier to digest.
  • Eat lots of protein (chicken, turkey, fish, grass-fed beef, eggs, etc). Make sure they are free of antibiotics and hormones.
  • Take a probiotic with your dinner (raw, refrigerated is best). 
  • Take an L-Glutamine supplement to help heal the lining of your intestines. 
  • Get plenty of fiber to help clean out your colon. Eat ground flaxseed, ground chia seeds, or make chia pudding.


Follow this diet and supplement routine for at least two weeks. You may need to go longer if your candida overgrowth is particularly bad. You can slowly start to introduce starchy vegetables and fruits into your diet, and gradually cut back on the antibacterial/anti-fungal supplements. Keep sugar, high-carb, and processed foods out of your diet altogether to prevent candida regrowth. Make eating probiotic foods and drinks a part of your regular diet as well.


Die-off:

It is common to experience “die-off” symptoms while doing a cleanse, because of all the toxins flushing from your body. You may feel tired, have a skin breakout, headache, or need to use the bathroom more frequently. However, if you are someone who has not been eating very healthy, I recommend changing your diet to more whole foods 2-4 weeks prior to starting the cleanse. The good news is that the die-off symptom are temporary and usually last 3-5 days. You will then start to feel much better as your body regains balance.


The first time I did a candida cleanse was about seven years ago. It was a rough experience. Looking back, I did not approach the cleanse properly. I went from eating a high-processed, high-sugar diet to – wham! – complete candida cleanse. I think it was too much for my body to handle all at once. I broke out in acne all over my face and felt really sick. I had intense sugar cravings, and really struggled to stick to the diet. After having made some healthy lifestyle changes over the past several years, I have found the cleanse to be much more doable, and the die-off symptoms are more minor. It’s a good idea to do a cleanse once or twice per year, even if it is only for a week to keep candida at bay.

DIY Moisturizing Sea Salt Texturizing Hair Spray

summer-1432382_1920


You can find a ton of recipes on the internet for sea salt hair spray to give you beach-wavy hair. Most of them use epsom salt (magnesium sulfate). Although magnesium sulfate will create waves and curls, it can be really drying and can cause your hair to be brittle with prolonged use.

I have discovered a more gentle, moisturizing recipe that will still give you the beach-hair you desire without drying out your locks! I use magnesium oil instead of epsom salt. Magnesium oil is much more gentle, yet still provides curl enhancement. I also sometimes add it to my homemade hair gel.

Ingredients:

Directions

Place a few drops of magnesium oil into the spray bottle. I have short, fine hair, so I only need a couple of drops. A little goes a long way. If you have longer or thicker hair, you could add a couple more drops. Then add the distilled water to fill the bottle. Add several drops of hair oil such as argan oil, coconut oil, or a blend such as this one by La Bella Figura  or my newest favorite by Tabitha James Kraan

You can play around with the measurements to get the right balance for your hair type.

DIY Natural Perfume Oil

6240460763_d20498e123_o

Gingerbread and Fir Natural Perfume Oil” by Tara Aveilhe is licensed under CC BY 2.0

Most commercial, synthetic perfumes are loaded with harmful toxins, some of which have been shown to be cancer-causing. Since I have tried to live a more natural and healthy lifestyle, I have not worn synthetic perfume for several years now. To be honest, I don’t miss it – at all! I actually love experimenting with different natural perfumes. My husband teases me, because I frequently order samples from various organic companies, trying to find my perfect perfume. I am often waving small perfume samples in front of his nose, asking for his opinion.

The pros to wearing natural perfumes: you smell lovely and NATURAL. When I smell synthetic fragrance on other people now, all I can smell is chemicals, and I want to sneeze. The essential oils used in natural perfumes is much easier on the nose, and depending on the type of oils used, will bring healing effects to the body as well as influence your mood. Synthetic fragrances can’t do that!

The cons to wearing natural perfumes: they can be pricey, especially if you’re buying high-quality perfumes. They also do not last as long as synthetic fragrance, so you have to reapply more frequently. This means that you will go through perfume more quickly, and with the high price-tag, it can really start to add up.

So, I decided to take a whack at creating my own natural perfume in order to cut down on the cost, yet still enjoy the benefits of natural essential oils. I decided to try making my own version of Misaki by Tsi-La. I absolutely love the smell of this perfume! You can read my review of Misaki here. At a whopping $128 per bottle, I rarely have the budget to splurge on this award-winning perfume.

I looked at the listed ingredients for the perfume and did some research on the proportions each ingredient would typically have in a perfume. I learned about top, middle, and base notes used in perfumes. It sounds complicated, but it only required identifying which ingredients were either top notes, middle notes, or base notes and then doing some basic math to determine the amount of each ingredient I would use.

Here are the ingredients I used for my Misaki dupe:

Top Notes (10-30%)

  • Bergamot
  • Mint
  • Tea

Middle Notes (30-60%)

  • French Lavender
  • Neroli
  • Honey

Base Notes (15-30%)

  • Vanilla

There were some ingredients listed in Misaki I did not use such as green tree moss, juniper berry, clary sage, or ylang ylang.

Misaki is a perfume infused into sugar cane alcohol in a traditional spray bottle. I decided to infuse my fragrance in jojoba oil instead and use a roller ball applicator.

Misaki Perfume Dupe:

Break open tea bags and put tea leaves into the mason jar.Place vanilla bean, essential oils, and honey into the mason jar. Pour jojoba oil into the jar and stir. Store in a cool, dark place for 2-3 weeks. Pour the mixture through a cheese cloth or fine mesh strainer to extract the perfume-infused jojoba oil. Pour into the roller ball bottle. The dark cobalt will help preserve the essential oils, and allow your perfume to last longer. Apply to pulse-points as often as you would like and enjoy!

IMG_3047

I was AMAZED at how great this perfume came out. When compared to the actual Misaki perfume, the scent came pretty darn close! The toughest part was having the patience to wait a few weeks for all the ingredients to infuse into the jojoba oil. It was much cheaper to make this perfume myself, and I won’t feel guilty reapplying as often as I want. The small roller ball bottle is also much more travel-friendly compared to the larger spray bottle.

There are enough leftover ingredients to make this perfume several times over, so it’s totally worth the cost of the ingredients. I will probably experiment with some of the other ingredients I left out so see if I can get the scent even closer to Misaki perfume.

Overall, I am extremely happy (and surprised) with how well this turned out. You can try this technique with any of your favorite natural perfumes as long as the main ingredients are listed. Have fun experimenting and share your perfume recipes with me!

Use Facial Oil to Clear and Cleanse Your Skin

17148148579_e69204a266_o

Homemade Tincture” by Nekenasoa is licensed under CC by 2.0

Growing up I was always taught to avoid skincare products that contained any type of oils. The theory was that using oil on your face would clog pores and lead to acne. Having been an adolescent with less than perfect skin, I wasn’t about to put anything on my face that might worsen my acne. I continued to avoid facial oil into my adulthood, and used facial cleansers and other products that were intended to clear acne.

I became frustrated that I was now an adult and still needed to use acne products to keep my acne at bay. Aren’t teenagers the ones who have to deal with this problem? I started to do some research, reading and learning about other adult women who had similar concerns about their skin.

Through my research, I discovered healthy ways to clear my acne at the root of the issue that would provide lasting results. The most important decision I made was to improve my lifestyle and make healthier choices. I write about how I changed my diet and introduced supplements to my daily routine here.

I also discovered how to improve my skincare routine. Here is what I learned:

Oil-Free Cleansers can Damage Skin

Most commercial facial cleansers (especially those geared for acne) contain harsh detergents such as sulphates that strip natural oil from your face and drying your skin. Stripping natural oils (sebum) from your face can cause skin damage and accelerate the signs of aging. It can also further aggravate acne, eczema, and rosacea.

Facial Oil will Help Reduce Oily Skin

Using products that contain high quality oils can actually trick your skin into thinking it has already produced enough oil, and will decrease your natural sebum production.

Facial Oil will Clear Pores

Using oil to cleanse your face will actually help dissolve clogged pores such as whiteheads or blackheads. Water cannot dissolve oil – but oil can dissolve oil, so the oil will mix and clear up clogged pores!

Cleansing with Oil Removes Makeup

Nothing removes makeup faster and more gently than an oil-cleanser – even eye makeup! I use One Love Organics Vitamin B Enzyme Oil Cleanser and Makeup Remover. Some other favorites to use are plain joboba oil or virgin coconut oil. This method is sometimes referred to as the “oil cleansing method.” The key is to massage the oil on dry skin, then wipe away with a warm wash cloth and rinse. You can follow with another cleanser for a deeper clean or just stick with the oil-cleanser.


Have you tried cleansing with oil? What are your favorite facial oils? Please share!


Condition Your Hair with Apple Cider Vinegar

lake-nyon-eva


For several years now I have been using the “no-poo” or “low-poo” method to care for my hair. This means I do not use shampoos containing harsh detergents such as sulphates. I use gentle shampoos that do not strip the natural oils on my scalp. Many people who use the no-poo method simply use baking soda as a shampoo and apple cider vinegar as a conditioner.

I found the baking soda to be a little too drying on my fine curls, so I use a gentle shampoo such as Mop C- System Hydrating Shampoo

Once you stop using harsh (and often toxic) products on your hair, your hair will become much more moisturized, have more volume and shine, and require less styling products. 

A few years ago I started using apple cider vinegar (ACV) to condition my hair. For some reason (I can’t remember why) I stopped using the apple cider vinegar, and started a quest to find the perfect organic conditioner. I was looking for something light, yet very moisturizing and not too expensive. I can tell you I spent a lot of money in the process – and remarkably came back to what seems to work the best – apple cider vinegar!

Here’s why you should use give ACV as a conditioner:

  • It is antibacterial and anti-fungal, so it heals dandruff 
  • It seals the cuticle of the hair to reduce frizz, provide shine, and keep hair moisturized
  • It’s slightly acidic and is the perfect PH for your scalp
  • It clarifies and gently removes product build-up
  • It is very inexpensive and a little goes a long way

After shampooing, I add approximately 1 or 2 teaspoons to 16 ounces of warm water and pour all over my scalp and hair. There is no need to let it sit on your hair. You can rinse immediately. If your hair is thicker or longer, you may need to use more ACV. My hair is short and fine, so a little goes a long way for me! I have found that if I use too much ACV, my hair becomes greasy. There is a slight vinegar smell when using this in the shower. However, it dissipates quickly, and your hair will not smell like vinegar at all once it is dry.

If you are using the no-poo or low-poo method, you will not be able to use hair products containing silicones as they can only be removed from your hair by using a shampoo with harsh sulphates. The silicones will build-up in your hair, and it will become limp and dull. I am confident you will find that you don’t need products with silicone once you start using natural, gentle products on your hair.

You will notice a great improvement in your natural, “naked” hair! It will feel incredibly soft, and look much shinier when using ACV as a conditioner!

Give it a try!


Easy At-Home Remedies for Colds

person-woman-coffee-cup (1)

It’s that time of year – when it seems like everyone around you is suffering from the cold and flu…and you keep your fingers crossed that you’re not next.

Unfortunately for me, I was.

After suffering from a severe cold the past several days (head and chest congestion, body aches, and fever), I felt inspired to share some natural remedies that helped me get through it and start feeling better. I rarely get sick to this degree –  a recent increase in stress likely caused my immune system to weaken. I am reluctant to take antibiotics due to the issues they cause within the digestive system and the balance of healthy bacteria (which is the core of a strong immune system to begin with!). Therefore, whenever possible, I rely on at-home remedies – and they actually work!

Gargle Apple Cider Vinegar

Apple cider vinegar is loaded health benefits! If you are struggling with laryngitis or a sore throat, gargling some apple cider vinegar can help kill bacteria in your throat, loosen mucus, and boosts white blood cell counts. The acid will coat your throat, preventing germs from accumulating. Dilute one tablespoon of raw apple cider vinegar (the one with “the mother”) with a couple splashes of warm water. Gargle, spit, and repeat. You can do this every few hours if you’d like. Your throat will thank you!

Use Hydrogen Peroxide to Get Rid of Ear Infections

Hydrogen peroxide will kill bacteria within your ear and loosen congestion. Lay one side of your head down onto a pillow. Use a dropper to put 1 or 2 drops of hydrogen peroxide into the ear facing the ceiling. Wait 7-15 minutes, then switch sides and repeat.

Use Steam to Clear Sinus and Respiratory Congestion

I remember going to my pediatrician as a child, and she told me that breathing in steam was just as effective as taking an antibiotic. I always remembered that. You can purchase an at-home facial steamer or boil water in a pot. The steam will sanitize your head and chest and break up congestion. Place a towel over your head and facial steamer/ bowl of hot water and breath it in for about 15 minutes. I also added several drops of hydrogen peroxide to boost bacteria-killing power. The steam is also great for cleaning out your pores!

Use a Neti Pot to Clean Your Sinuses

A Neti Pot is a little pot that looks like a cross between a tiny teapot and a genie lamp. You fill it with a saline solution, place the spout in one nostril, and tilt your head to the side as you raise the Neti Pot, causing the solution to flow through your sinuses and out your other nostril. Then you reverse nostrils and repeat. Sounds kind of gross, but it works magic! I use a teaspoon of sea salt and fill the pot with lukewarm water (if the water is too warm, it will burn). If you’ve ever gone swimming in the ocean and had salt-water up your nose, it feels a little like that. The salt will clear away mucus and kill germs.

Drink Detox Tea

Speed up your recovery by drinking a tea with plant and herbs that support your liver to help flush out toxins. Try this detox tea with healing ingredients such as dandelion, burdock root, and ginger. Add some raw honey to help sooth a sore throat. Drinking tea will also help increase your fluid intake and warm your body.

In addition to these at-home remedies, nothing beats getting plenty of rest, eating whole foods, and drinking lots of water. Listen to your body! If your body is telling you to slow down, don’t push yourself to go to work or any other obligations if you can help it. Take care and feel better!


Healthy “Pumpkin Spice” Latte

fauxpumpkinspice

With cold weather approaching, and autumn just around the corner the fall-flavor season is nearly here! I am a lover of all things pumpkin, especially a Pumpkin Spice Latte from Starbucks. However, all that sugar and caffeine will not do any favors for my complexion or immune system.

Instead, try this warm, yummy recipe originally found on No More Dirty Looks to get your pumpkin spice fix! The main ingredient is turmeric – giving it that pumpkin color.

Here are some of the health benefits of turmeric:

  • Research has shown turmeric to have anti-inflammatory and antioxidant benefits. It reduces the likelihood of heart attacks, delays diabetes, and reduces heartburn.
  • Turmeric is also cancer-fighting: killing cancer cells, reducing the size of tumors, and increasing the effectiveness of chemotherapy.  
  • Studies also show that turmeric can repair stem cells in the brain, indicating it can be beneficial for those suffering from stroke or Alzheimer’s.
  • Research also indicates turmeric is just as effective for pain as ibuprofen for people suffering from osteoarthritis.

Reduce inflammation, kill cancer, improve brain function, and reduce pain? Sign me up!

Faux Healthy Pumpkin Spice Latte:

  1. Heat one cup of unsweetened coconut milk (either on stovetop or in microwave)
  2. Whisk in:
    • 1/4 teaspoon if turmeric powder
    • 1/2 teaspoon of cinnamon
    • pinch of black pepper
    • pinch of nutmeg
    • pinch of cinnamon
    • 1/2 teaspoon of vanilla
    • 1 teaspoon of honey
  3. Blend it all up with a whisk or frother.

This recipe is free of dairy, gluten, sugar, and caffeine. Deliciousness in a cup – and so good for you!

DIY Rose Moisturizing Body Oil Spray

Rose Body Oil Spray

I am someone who likes to shower in the mornings, and I am usually in a hurry to get to work. Simply applying body lotion post-shower can be too time-consuming for my hectic mornings. With the dry weather season approaching, I need to take the time to add some extra moisture to my skincare routine to avoid scaly knees and elbows!

I have created an easy, natural, and budget-friendly way to moisturize in the morning.

DIY Rose Moisturizing Body Oil Spray:

Pour it all into an 8oz Glass Spray Bottle and shake it up.

Application: After finishing my shower, while my skin is still soaking wet and standing in the tub, I mist my skin with the oil spray. Then I quickly use my hands to smooth the oil over my skin to ensure an even application. I gently pat my skin dry with a towel. The process only takes a minute!

I love the romantic rose fragrance, and the cacao adds some depth and warmth to the scent. The best part about this recipe is that you can customize it to fit your needs. You can use other moisturizing oils such as sweet almond oil or olive oil. You can substitute other essential oils instead of rose such as lavender.


Have you tried a body oil spray before? What are your favorite ways to moisturize?

Homemade Flaxseed Hair Gel for Perfect Curls

photo

The is a post for my fellow curlies! Do you want well-defined, frizz-free curls that will make others ask you with surprise, “Is that your natural curl?” Since I have been using my homemade hair gel recipe, I am asked that question all the time. This recipe is very easy to make, and gives me my best curls yet – even when compared to store-bought gels (and believe me, I’ve tried MANY). There are several variations of this recipe available on the internet. Here is what has worked for me:


Ingredients:

  • 1/4 cup of flax seeds
  • 2 cups of distilled water
  • 1/2 teaspoon of magnesium oil (optional, for curl enhancement)
  • Fine mesh wire strainer
  • Glass container

Directions:

Place water and flax seeds in a saucepan and set stovetop to medium-high. When the water starts to bubble, turn the heat down to a simmer, stirring the seeds occasionally. The water will start to become white and frothy with the consistency of an egg-white. The longer you cook the seeds, the thicker the gel will be. I usually let it simmer for about ten minutes.

Pour the water and flax seeds through the mesh strainer, into your container. It may take some time to strain if the gel is thick. While the gel is still hot, pour in the magnesium oil and mix with an electric mixer or frother. The consistency of the gel will be “goopy” or “snotty” – like Nickelodeon slime! Allow to cool and store in the refrigerator for up to two weeks.

Here is how I use it:

I take globs of gel and finger-comb it through my sopping wet hair. Then I comb my hair upside-down for better volume and distribution of the gel. While my head is still upside-down, I scrunch in a little bit (nickel-size amount) of organic hair gel for some extra hold like Kinky-Curly Curling Custard. I plop my hair in an old t-shirt for about 15 minutes. I diffuse upside-down until it it 80% dry. I use jaw clips to lift my hair at the roots for volume until my hair is completely dry. Then I shake my hair, fluff at the roots, and scrunch out any “crunch” left in my hair. 


What I love about this gel is how it clumps curls, and gives superb definition! It it also really affordable and free of toxins. The gel is very light, so it will not weigh down your curls. Some curlies can use this without another gel over it, especially if they already have tight curls. I need a little extra hold, so using another gel in conjunction with my flaxseed gel works well for me.

I like to use magnesium oil in this recipe for extra curl enhancement. I previously used store-bought gel with magnesium sulphate (a.k.a epsom salt). I found that it really enhanced my curls (like after a day at the beach). However, by the end of the day, my hair would feel and look brittle. As we know, salt can be very drying. Thankfully, I discovered magnesium oil (which is actually magnesium chloride). It makes my curls really spring up, but is much less drying than magnesium sulphate. Win!

I also love using this gel on second-day, dry hair. It smoothes any frizz and re-clumps my curls. The only downside to using this gel is that it needs to be kept in the fridge unless you plan to add a preservative (like vitamin e), therefore it is not as convenient for travel. However, the results far out way any inconvenience!

You can add other ingredients to customize this gel to meet your hair needs such as essential oils, shea butter, or your favorite conditioner.

Have you tried flaxseed hair gel? What works for your curls?

Treating Yourself to an At-Home Facial

3763643058_868499d667_z

Jurlique Organic Facial 2” by FoundryParkInn is licensed under CC BY 2.0

I’m a firm believer in taking time to engage in self-care rituals that help me to slow down and enjoy the little pleasures in life. I usually give myself a facial every Sunday evening. There’s something about that deep-skin-clean feeling that gives me a little boost of confidence and prepares me to face the workweek ahead. If I find myself eating a little too much sugar or sodium, or perhaps having a few too many glasses of wine, my skin starts appearing dehydrated, dull, and more prone to blemishes. There’s nothing like a facial to jumpstart my skin and give me that little bit of motivation I need to get back on the healthy bandwagon. Beautiful, healthy skin comes from the inside out! Nothing helps me look more radiant than a clean diet, lots of water, and plenty of sleep.

Here’s how to give yourself an at-home facial:

Step 1: Double cleanse

Use an oil cleanser like Vitamin B One Love Organics and massage into face and eyes while skin is dry to loosen any makeup, oil, and dirt. The oil in the cleanser works with the your skin’s natural oil to dissolve clogged pores. Take a hot washcloth and wipe away the cleanser. Then use a second cleaner such as my favorite Shamanuti charcoal cleanser on wet skin. Using a second cleanser further helps deep clean into your pores.

Step 2: Manual Exfoliation

While your skin is still sopping wet, use a facial-scrub such as my personal favorite Brand New Day by One Love Organics. I love this scrub because it is super gentle. You want to scrub VERY gently in circular motions. Scrubbing too harshly can damage your skin’s acid mantle, causing it to become more vulnerable and irritated. You want to scrub just enough to remove any dead skin that can contribute to clogged pores. Rinse and pat dry.

*If you have active acne, you may want to skip this step since scrubbing blemishes can open up them up, and intereferes with your natural healing. It’s the same as picking a pimple – which can lead to scars!

Step 3: Steam

Use a facial steamer such as this one by Conair or heat up some water in a pot over the stove. Not only will the steam help clear your pores, but its great for clearing sinuses! Sit with your face over the steamer and a towel over your head to trap all the steam. Steam for at least ten minutes to give the steam enough time to open your pores. You can get creative by putting some rose water, a few drops of lavender essential oil, or green tea in the hot water to infuse the steam. Breathe in slowly and deeply – and relax!

Step 4: Facial Mask

Use a facial mask to further chemically exfoliate your skin and provide it with skin-happy ingredients! Chemical exfoliation occurs when natural acids or enzymes loosen dead skin cells so that they can be easily removed. Some masks can be quite harsh so be careful and test a small patch of skin before applying it to your face. My skin does not always react well to stronger masks or peels. I have tried many masks and finally found one that is both gentle and very effective in cleaning deep into pores, exfoliating, and healing blemishes. I really like using Refine clay mask by Blissoma. You can also use organic yogurt or sour cream. The lactic acid in the dairy will exfoliate and make your skin glow!

Step 5: Tone

Use an organic toner to remove any remaining bits of your face mask and tighten up your pores. I use a homemade toner with one-third apple cider vinegar and two-thirds rose water. No other toner has worked better for my skin!

Step 6: Moisturize

While skin is still a little damp, use your favorite moisturizer, balm, or oil to seal in moisture. I use rosehip seed oil by Pai. Rosehip seed oil is excellent for diminishing the appearance of discoloration or scarring left from acne.

And voila – Gorgeous, healthy skin is revealed! I have had facials at salons in the past – even ones considered to be organic and for sensitive skin. I always left feeling like my skin was attacked – feeling irritated and raw. Doing at-home facials has given me far better results than any salon I have been to. I hope you find these tips helpful!


Copyright © 2024. Powered by WordPress & Romangie Theme.